Join the creative marketplace where millions of shoppers spend billions each year purchasing directly from creative entrepreneurs like you.
Great value
List your first item for just $0.20—you only pay transaction, payment processing, and offsite advertising fees when you make a sale.
Powerful tools
Our tools and services make it easy to manage, promote and grow your business.
Support and education
Reach out to Etsy support specialists anytime you need a hand, and get tips on running a successful shop in our Seller Handbook.
Simple & secure
No additional monthly fees
Secure transactions
Automatic deposits
Seller protection
$0.20 Listing fee
Listings are active for four months, or until they sell.
6.5 % Transaction fee, 3% + $0.25 payment processing fee*
When you sell an item, there's a small commission and standard payment processing fee.
15% Offsite Ads Fee*
Etsy pays to advertise your items across the web through Offsite Ads. You only pay a fee when you make a sale from one of those ads. Learn more about advertising fees.
We process payments on our secure, SSL-encrypted platform, and have security specialists and fraud detection systems to protect you and your buyers 24/7.
Listing fees are billed for $0.20 USD, so the amount in your currency may vary based on changes in the exchange rate. Payment processing fees vary by bank country.
* Fees vary according to the location of your bank account. Learn more about your region’s fees.
* Offsite advertising is optional for most sellers, but may be required based on how much you make in sales on Etsy in a 12 month period. Visit our Help Center for more details on Offsite Ads fees.
Simple, powerful tools
Spend less time managing your shop and more time on the fun stuff.
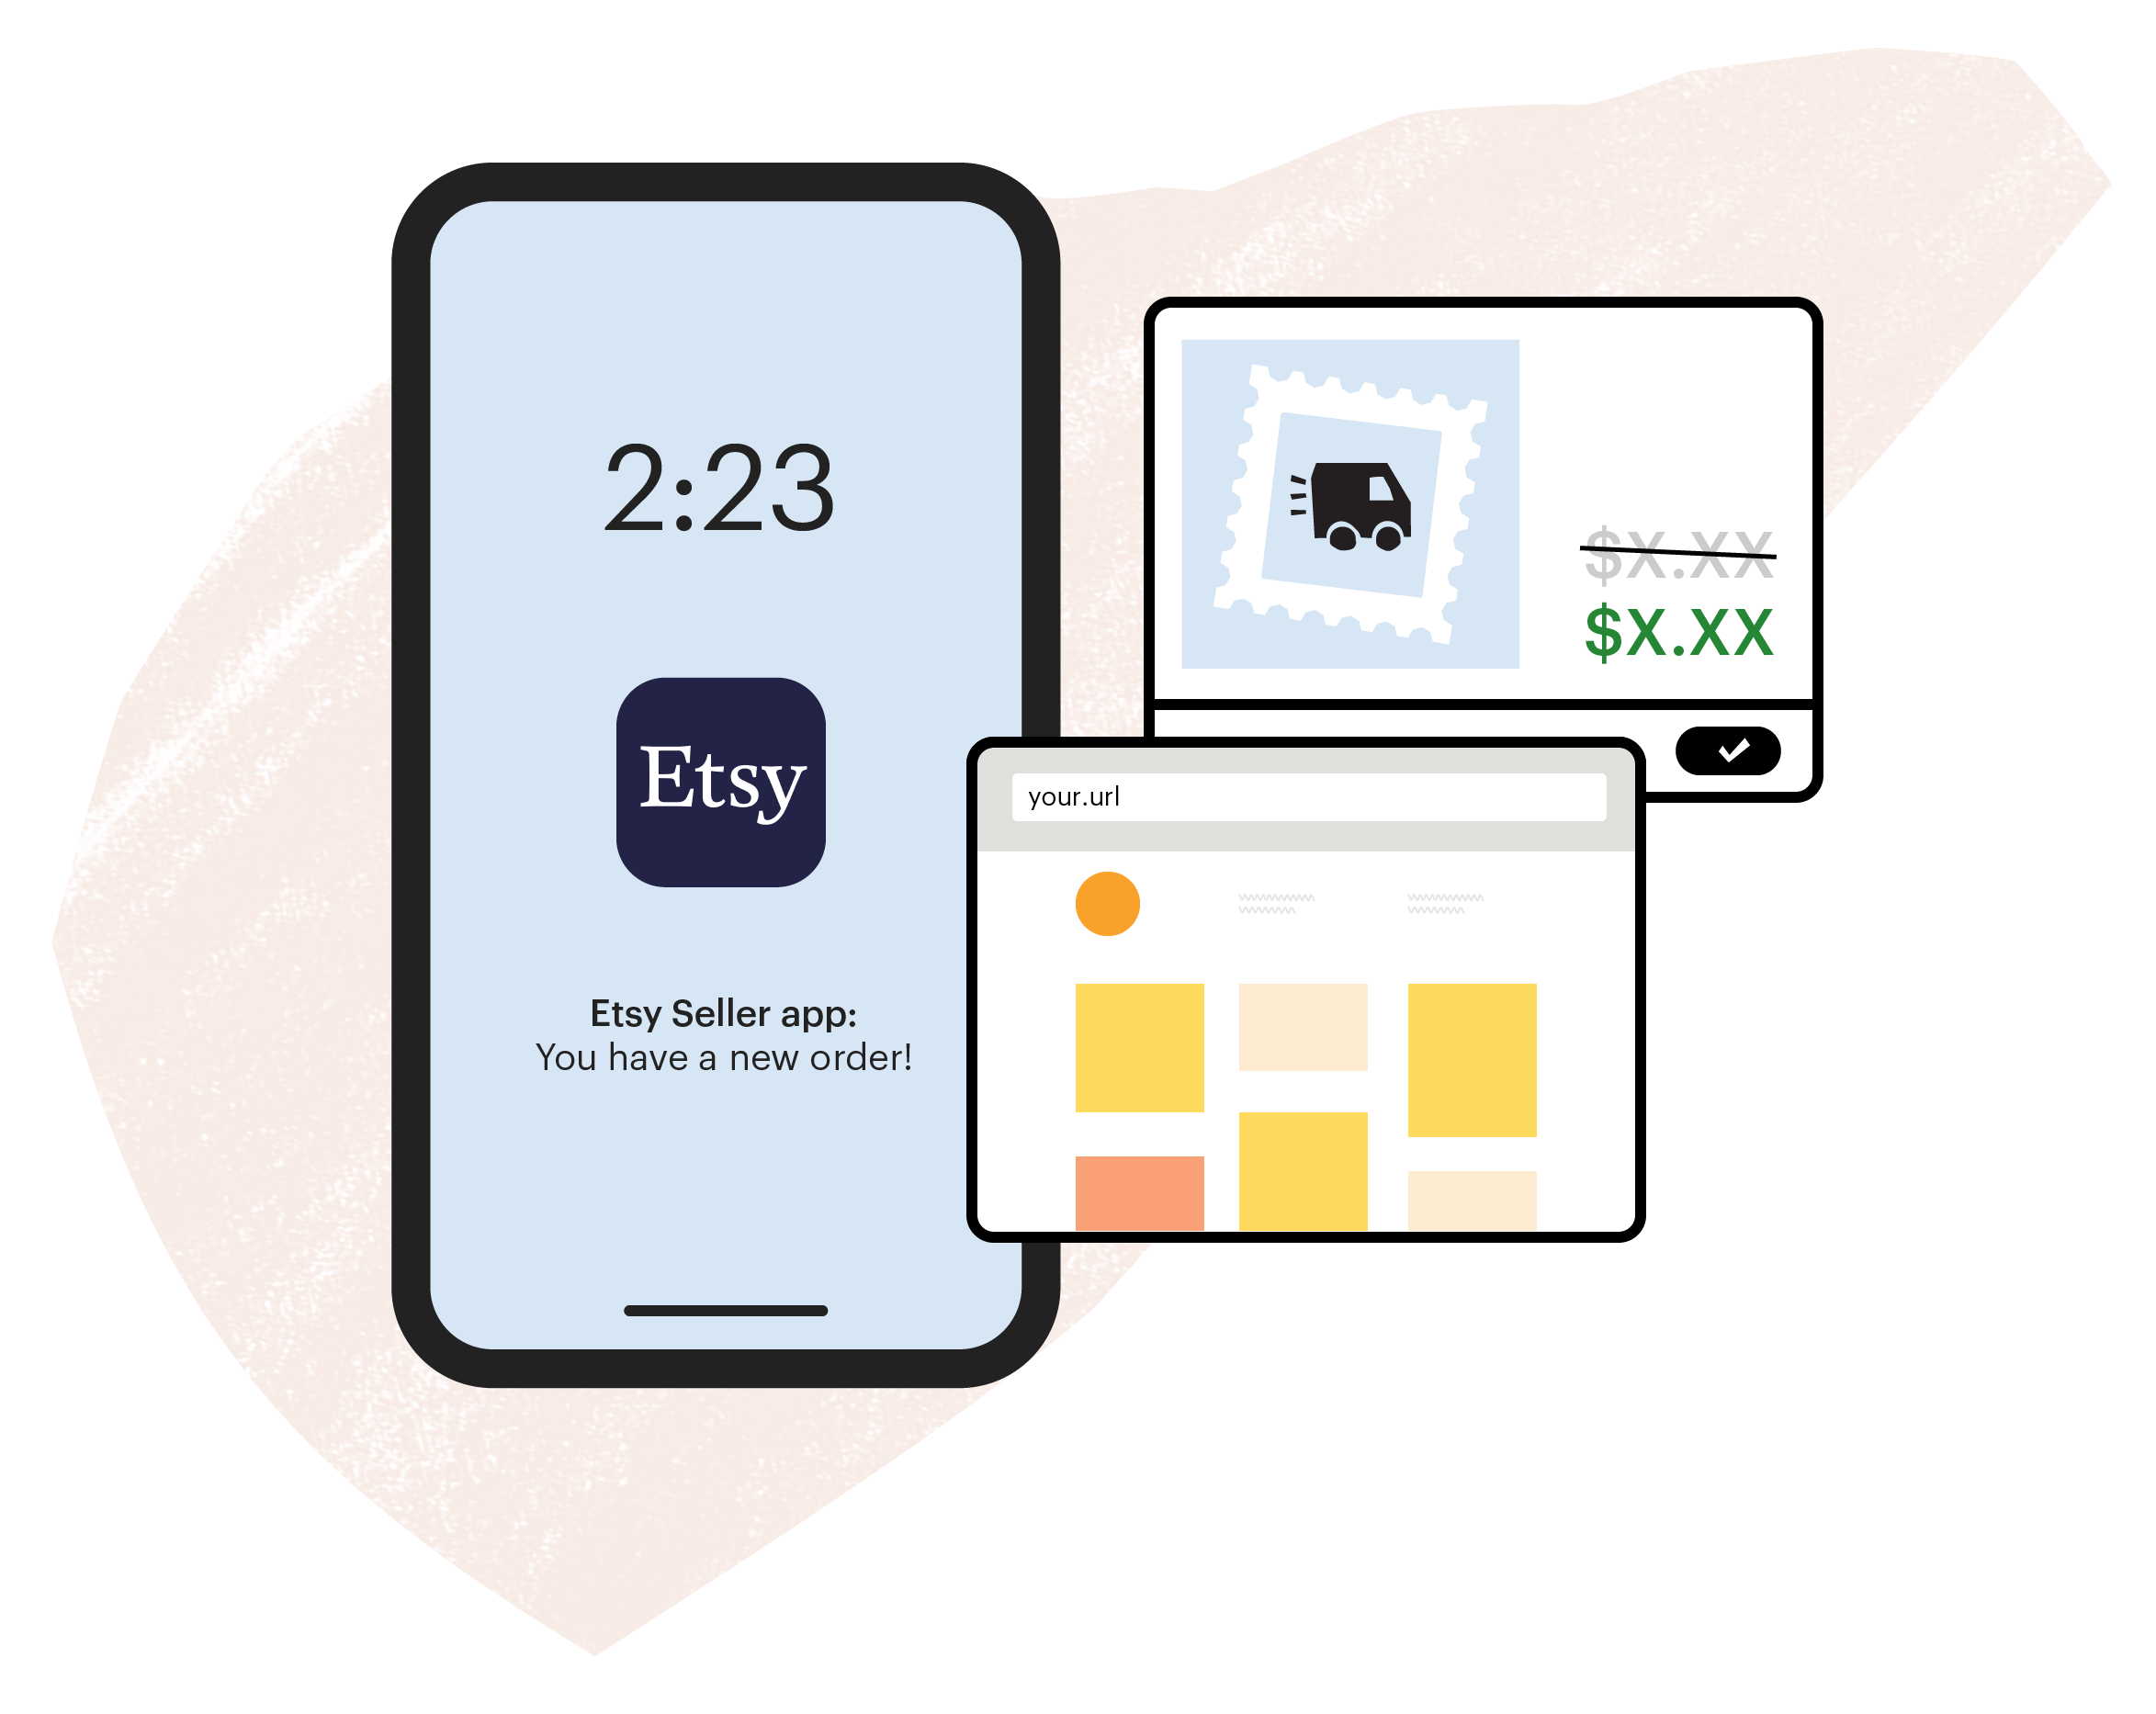
Manage your business anywhereUse the Etsy Seller App to manage orders, edit listings, and respond to buyers instantly, from anywhere.
Save big on shippingBuy and print discounted postage for your orders in seconds, right from your Etsy account.
Create your own website in minutesDesign a custom website that's powered by your Etsy shop.
Reach a world of shoppers
Build your brand with powerful marketing tools.
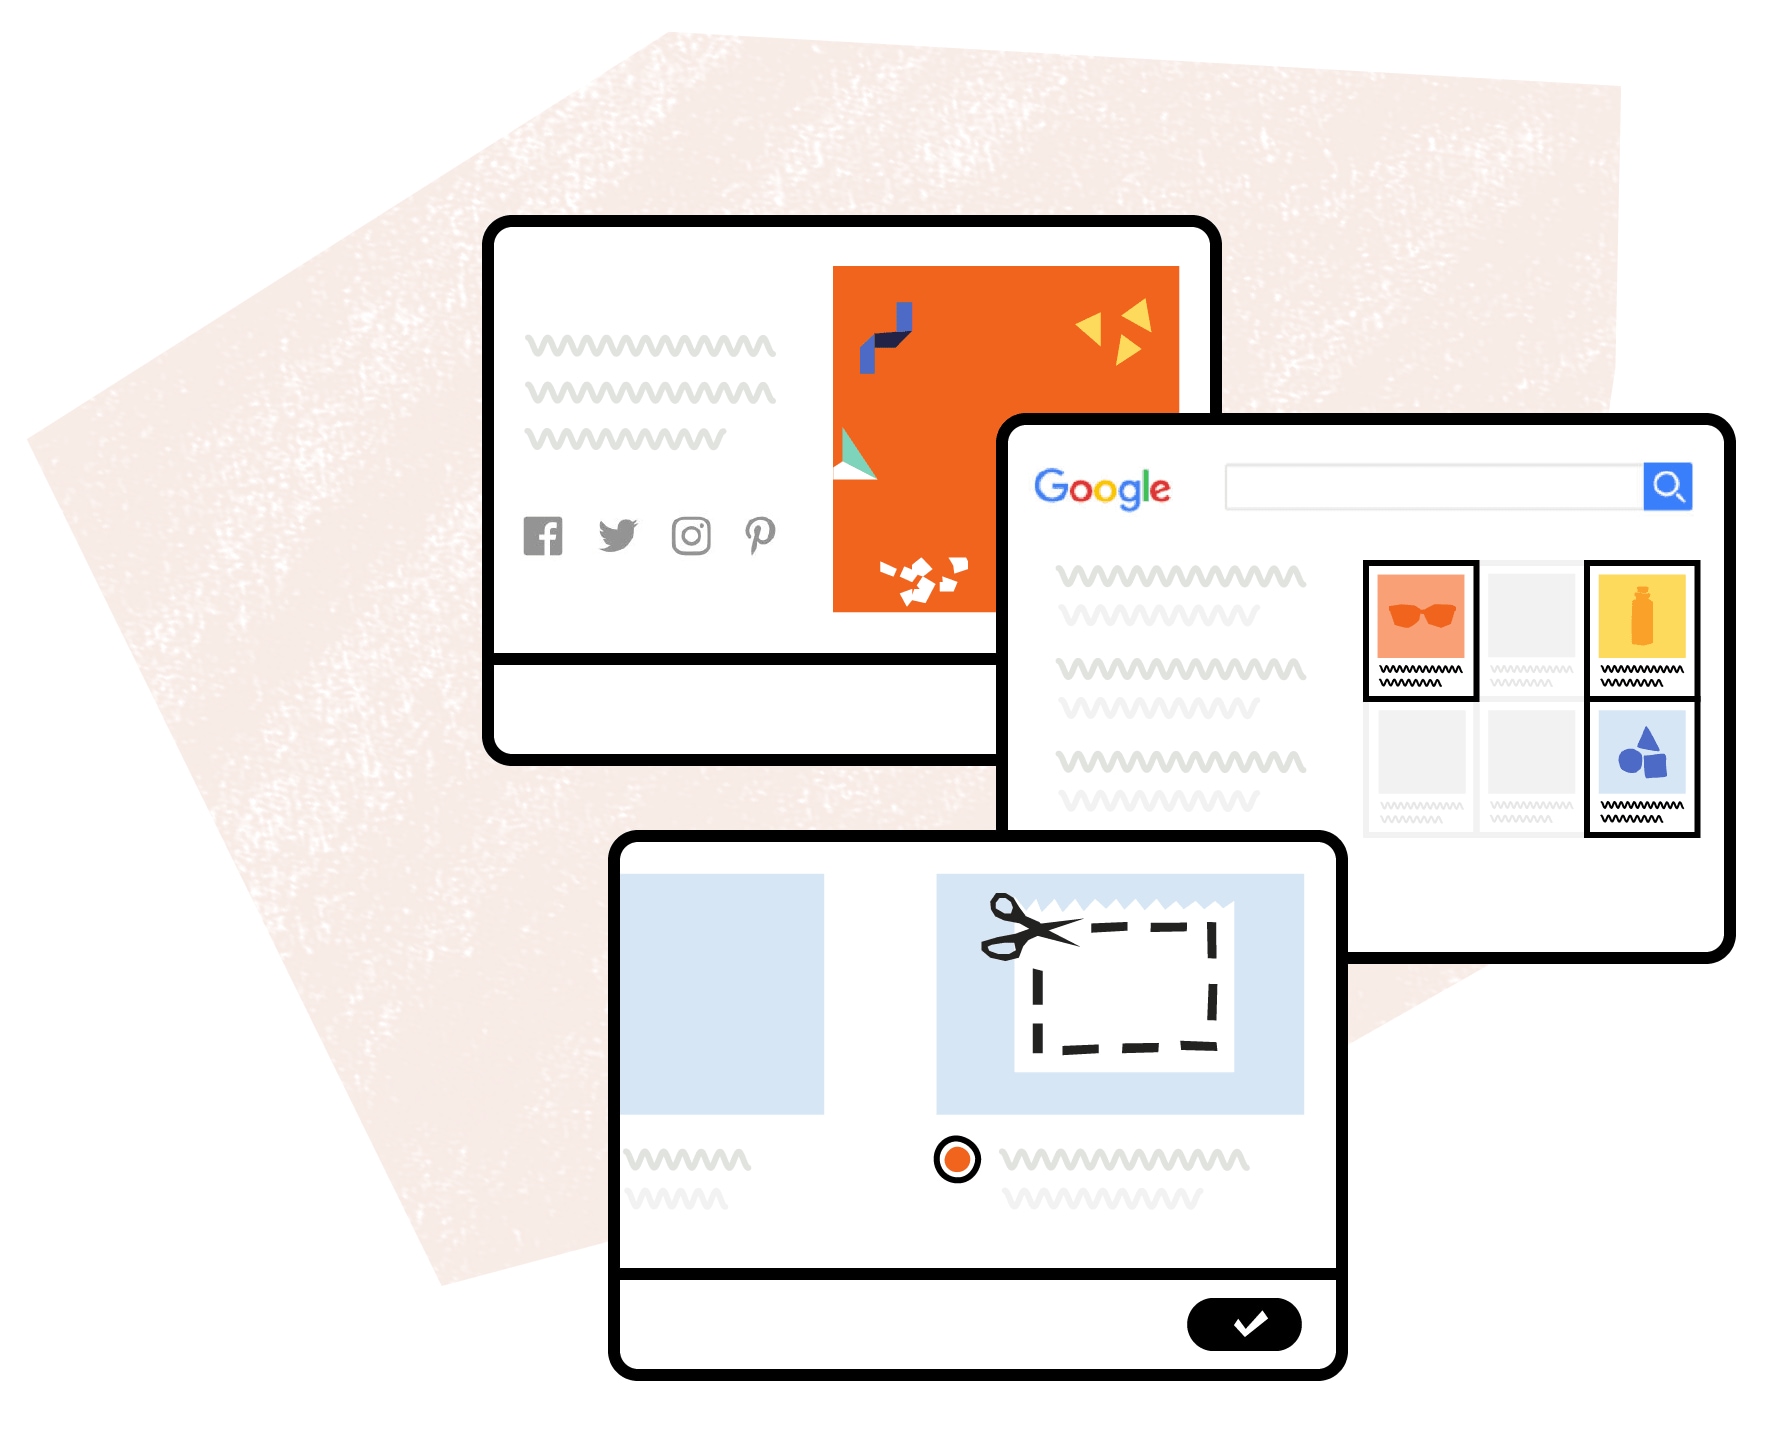
Our tools take the guesswork out of crafting the perfect posts for Facebook, Pinterest, Twitter, or Instagram.
Reach millions of shoppers on and off Etsy with our advertising tools: Etsy Ads and Offsite Ads. With Etsy Ads, your listings are more visible in Etsy search. With Offsite Ads, we’ll pay to advertise your listings on sites like Google, Facebook, Instagram, Pinterest, and Bing. When you make a sale from those ads, you pay an advertising fee on that sale.
Attract new customersCreate a sale or coupon to catch the eye of shoppers or reach them right in their inboxes with a targeted offer.
Help when you need it
We’re committed to helping our 1.8 million sellers thrive, with support and education for shops big and small.
Talk to us
Reach our support staff by email or request a phone call whenever you have a question.
Tips for success
Learn best practices for your business with our always-updating Seller Handbook.
Seller newsletter
Read the Etsy Success newsletter for tips on improving your shop, delivered straight to your inbox.
Get advice
Ask questions and find a community of sellers like you in Etsy’s forums and Teams.
Seller Stories


"My shop started out as a hobby, then a side hustle to support my teaching job. When my first son was born in 2014, I decided to grow it into a full-blown business. Selling on Etsy has given us the chance to watch our kids grow while building our business as a family."
Nicole Lewis from Art 2 the Extreme
Noblesville, Indiana

"I never imagined running a vintage shop could make me feel like I was bringing joy into people’s homes, but that’s what I’ve come to experience. I love that it feels like a very personal experience both as a shopper and seller."
Alva Mac Gowan from Copenhagen Collected
Copenhagen


"As a mother of three African-American kids, I felt a drive to create something for my children, and children like them, who were unaccustomed to seeing their likenesses in toys. One of my greatest joys when I launched my shop was to have my children come in, glance at my prints, and ask ‘Oh! Is that me?’"
Shaina Adams from Paper Play + Wonder
San Antonio, Texas

"Sitting down at my workbench to create continues to be my lifeline. My business has continued to grow, and that success is affirming of the bet I made to follow this path at age 45."
Micha González from Micha González
Mexico City

What can you sell on Etsy?


Handmade Goods


Vintage
(20 years or older)


Craft Supplies
Etsy is a marketplace where millions of people around the world connect to make, sell, and buy unique goods. You can sell handmade goods, vintage items and craft supplies on Etsy. Learn more
Frequently Asked Questions
Here are some common questions about selling on Etsy.
How do fees work on Etsy?
There are three basic selling fees: a listing fee, a transaction fee, and a payment processing fee. There’s also an advertising fee for sales that come from Offsite Ads.
It costs $0.20 to publish a listing to the marketplace. A listing lasts for four months or until the item is sold. Once an item sells, there is a 6.5% transaction fee on the sale price (including the shipping price you set). If you accept payments through Etsy Payments, we also collect a 3% + $0.25 payment processing fee when an item is sold.
Listing fees are billed for $0.20 USD, so if your bank's currency is not USD, the amount may differ based on changes in the exchange rate. The payment processing fee may also vary by bank country.
You pay an advertising fee on any sales you make from Offsite Ads. When you open your Etsy shop, you can decide if you want to participate in Etsy’s advertising services.
What do I need to do to create a shop?
It's easy to set up a shop on Etsy. Create an Etsy account (if you don’t already have one), set your shop location and currency, choose a shop name, create a listing, set a payment method (how you want to be paid), and finally set a billing method (how you want to pay your Etsy fees).
How do I get paid?
With Etsy Payments, our easy-to-use and secure payment system, you may accept payments from a wide variety of payment methods including credit and debit cards, PayPal, Google Wallet, Apple Pay, and Etsy Gift Cards. Funds from your sales are deposited directly to your bank account in your currency, no matter how or from where the buyer pays. For sellers based in countries where Etsy Payments is available via Payoneer, funds from your sales will be deposited into your Payoneer account.
How does Etsy protect sellers?
Eligible purchases made using Etsy Payments qualify for Etsy Purchase Protection. This means that Etsy will refund buyers and you’ll keep your earnings if a qualifying order is damaged or doesn’t arrive. Terms apply.What can I sell on Etsy?
Etsy provides a marketplace for crafters, artists and collectors to sell their handmade creations, vintage goods (at least 20 years old), and both handmade and non-handmade crafting supplies.
Want more information? Here are some resources to help you get started.
Still have more questions? Feel free to contact us.
Contact Etsy